为外部目录启用凭据交易
通过凭证交易,您可以使用 Snowflake Open Catalog 在一个地方配置和管理对目录及其底层云存储的访问控制。对于内部目录,凭据交易默认启用。对于外部目录,您可以通过使用以下选项之一来启用凭据交易:
重要
在您为外部目录启用凭据交易之前,请确保目录中的表没有重叠的存储目录位置。否则,用户可能会获得他们不应该有权限访问的表的访问权限。有关更多信息,请参阅 外部目录的凭据交易。
使用 Open Catalog
登录 Open Catalog。
在左侧菜单中,选择 Catalogs。
在目录列表中,选择您要启用凭据销售的目录。
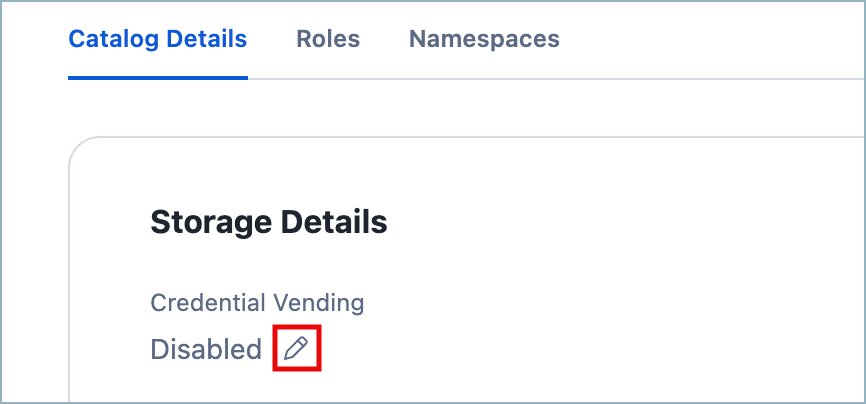
在 Catalog Details 选项卡下,在 Storage details 中的 Credential Vending 下,选择 Edit 图标。
从出现的弹出窗口中,选择 Enable。
Apache Polaris™ (Incubating) CLI
本节描述了如何通过使用 Polaris CLI 为外部目录启用凭据交易。Apache Polaris (Incubating) CLI 是一个命令行界面,供客户以编程方式更新设置。有关更多信息,请参阅 Apache Polaris (Incubating) CLI (https://polaris.apache.org/in-dev/unreleased/command-line-interface/)。
要为外部目录启用凭据交易,请使用与 Polaris CLI 的服务连接。
第 1 步:准备一个具有必要权限的服务连接
创建主要角色 以分配给新的服务连接。如果您已经有一个主要角色分配给服务连接,请跳过此步骤。
配置服务连接 并保存客户端 ID 和客户端密钥,以便稍后与 Polaris CLI 一起使用。如果您已经有服务连接来使用 Polaris CLI,请跳过此步骤。
在目标目录中创建一个目录角色,以授予其所需的权限以启用凭据交易。如果您已经拥有用于启用凭据交易的目录角色,请跳过此步骤。
保护目标目录。在确保安全时,请确保目录角色至少获得以下权限之一:
CATALOG_MANAGE_CONTENT
CATALOG_MANAGE_METADATA
CATALOG_WRITE_PROPERTIES
要启用凭据交易,执行此操作所使用的服务主体必须获得以下权限之一。
第 2 步:运行 CLI 命令
要运行 CLI 命令,请参阅适用于您的环境的相关步骤:
以 Linux 或 Mac 用户身份运行 CLI 命令
先决条件
在您运行 CLI 命令之前,您应该满足以下环境先决条件:
Python 3.x (https://www.python.org/downloads/)
Git (https://git-scm.com/)
要在 Linux 或 Mac 中运行 CLI 命令,请按照以下步骤操作:
运行以下命令克隆 Apache Polaris™ (https://github.com/apache/polaris) GitHub 存储库:
git clone https://github.com/apache/polaris.git
有关如何克隆 GitHub 存储库的说明,请参阅 克隆存储库 (https://docs.github.com/en/repositories/creating-and-managing-repositories/cloning-a-repository)。
为 CLI 命令定义以下环境变量:
export CLIENT_ID=<client-id>
export CLIENT_SECRET=<client-secret>
export sfAccountUrl=https://<open_catalog_account_identifier>.snowflakecomputing.cn
export catalogName=<my-catalog>
其中:
sfAccountUrl是以下 URL:https://<open_catalog_account_identifier>.snowflakecomputing.cn。对于<open_catalog_account_identifier>,请指定您的 Open Catalog 账户的账户标识符。根据账户的区域和云平台,此标识符可能单独是账户定位器(例如,xy12345)或包含其他部分。有关更多信息,请参阅 使用账户定位器作为标识符。CLIENT_ID是您保存的服务连接的 client_id。CLIENT_SECRET是您保存的服务连接的 client_secret。catalogName是您想要启用凭据交易的外部目录的名称。
从您克隆 Apache Polaris 仓库的目录中,运行 Polaris CLI:
./polaris \
  --base-url "${sfAccountUrl}/polaris" \
  --client-id ${CLIENT_ID} \
  --client-secret ${CLIENT_SECRET} \
  catalogs \
  update "${catalogName}" \
  --set-property "enable.credential.vending"="true"
以 Windows 用户身份运行 CLI 命令
先决条件
要运行以下代码,您需要在 Windows 机器上安装 Docker。
使用以下代码示例创建一个 Dockerfile:
FROM python:3.11

# install git
RUN apt-get update && apt-get install -y git

# get polaris
RUN git clone https://github.com/apache/polaris.git

WORKDIR /polaris

RUN pip install --upgrade pip

# install polaris cli
RUN ./polaris --help
从 Dockerfile 所在的文件夹中,使用以下命令构建 Polaris CLI 的 Docker镜像:
% docker build -t polaris-cli . 0.0s
使用以下命令运行 Docker 容器和 Bash 终端:
% docker run --rm -it polaris-cli /bin/bash
root@ae4c8353b45f:/polaris#
运行以下代码以更新目录,将属性
enable.credential.vending设置为true:% docker run --rm -it polaris-cli /bin/bash root@ae4c8353b45f:/polaris# export CLIENT_ID=<client-id> export CLIENT_SECRET=<client-secret> export sfAccountUrl=https://<open_catalog_account_identifier>.snowflakecomputing.cn export catalogName=<my-catalog> root@ae4c8353b45f:/polaris# ./polaris \ --base-url "${sfAccountUrl}/polaris" \ --client-id ${CLIENT_ID} \ --client-secret ${CLIENT_SECRET} \ catalogs \ update "${catalogName}" \ --set-property "enable.credential.vending"="true"
运行以下代码以验证参数
enable.credential.vending是否配置正确:root@ae4c8353b45f:/polaris# ./polaris \ --base-url "${sfAccountUrl}/polaris" \ --client-id ${CLIENT_ID} \ --client-secret ${CLIENT_SECRET} \ catalogs \ get "${catalogName}" {"type": "EXTERNAL", "name": "<my-catalog>", "properties": {"default-base-location": "s3://<bucket-name>/polaris/my-catalog-v2-storage/", "enable.credential.vending": "true"}, "createTimestamp": 1722547448827, "lastUpdateTimestamp": 1730906335286, "entityVersion": 3, "storageConfigInfo": {"storageType": "S3", "allowedLocations": ["s3://<bucket-name>/polaris/my-catalog-v2-storage/"], "roleArn": "arn:aws:iam::<aws-account-id>:role/<polaris-aws-role>"}}